Friday, January 20, 2012

Family Fridays: Our Ever Changing "Routine"

We always enjoy a good book
This was Nate's first week off of classes for winter break. We have been enjoying a little extra time together, but are working on extra projects too. So some of our daily routines are changing, but some are staying the same.

One of the most consistent routines we have right now is our "Morning Routine." Every morning the boys wake up and ask for granola. They apparently need granola to be civil in the morning. Even if I am planning on making pancakes or hash browns they feel they need to have at least a little granola to start the day off right. Now both boys can get their own bowl and spoon, which is helpful.

While their eating their granola, I usually read a chapter of the Word and a couple of its stories to them. We also practice their memory verses and do a few English and Chinese flashcards. Then the boys take their bowls to the sink and run off to play. Then I clean up the granola mess.

January Unit Study Fun
The middle of our days are the most varied right now, changing a lot from day to day. Sometimes we do snack and school later, sometimes we do extra unit study activities for the month, and sometimes we just work and play together as a family. The boys have been playing a lot more jump-on-Daddy games lately.

We also have a pretty consistent "Evening Routine" before bed that is working pretty well for us now. First, we set a fifteen minute timer, and the boys pick up the toys, while mom and dad work on cleaning up anything else that needs attention before bedtime. It was taking the boys a really long time to pick up their toys, until we started setting the timer. Aaron is old enough now that he understands the concept really well and he loves beating the clock. It has become like a video game to him. Who needs a Wii?

Apple pie in July
After things are back in general order, if we have beaten the clock, we have a small treat while Daddy reads the Word to the family. We've found that saving dessert until later and using it as a reward for picking up (and as something to do quietly while daddy is reading) to work really well for us right now. After we're done reading, the boys run their dishes to the sink and then run around the apartment a few times playing games with Daddy to burn off any sugar energy they've ingested

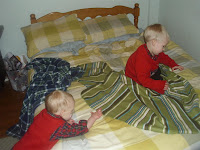
Getting ready for bed, Christmas Eve
Then we settle back down again, brush teeth, and get ready for bed. Then we all cuddle together in our bed and sing and pray together. It's a sweet way to wind down and spend time together.

Thursday, January 19, 2012

Chinese New Year Themed Preschool Activity: Window Decorations Coloring

The boys received window crayons and markers for Christmas, and I think they are a really cool way to practice coloring and writing in a new and interesting way. And all you have to do to take down these decorations is wipe them off.

To help the boys learn about the different decorations and symbols used to celebrate Chinese New Year (known here as Spring Festival), I let the boys color some window decorations of their own. Red lanterns, red tassels, and the animal (2012 is the year of the dragon) to represent the new year are traditional decorations of this festival.

To do this activity, I just outlined some lanterns on the window one day and a dragon/dinosaur another day. Then I gave the boys each a yellow and red marker or crayon and let them color away. Decorations for Spring Festival are traditionally red and yellow. At the end of the day, we just washed the window off with vinegar water window cleaner, and we have a fresh canvas for new drawings.

We are talking to our boys about what these decorations traditionally mean here, and I think this is another easy activity to aid this discussion.

Wednesday, January 18, 2012

Chinese New Year Themed Preschool Activity: Coloring Chinese New Year Decorations

To help the boys learn about the different decorations and symbols used to celebrate Chinese New Year (known here as Spring Festival), I let the boys color some paper decorations of their own. We are talking to our boys about how we don't want to buy or put up a lot of real decorations for this holiday. (Chinese people think their pretty red decorations can keep bad luck away and bring good luck.) But this was a fun activity to help them understand a lot of the decorations going up all over.

Red lanterns, red tassels, and the animal to represent the new year are traditional decorations of this festival. This year is the year of the dragon, so there are dragons everywhere. Since they are everywhere here, we've been talking to the boys about how the stories with dragons in them could have come from people talking about dinosaurs, just using a different name. The boys love dinosaurs.

This activity is pretty simple. I just printed off some coloring sheets and gave the boys a bunch of red and yellow crayons, colored pencils, and markers. Red and yellow are the colors of their traditional decorations here. While we all colored, I talked to them about the decorations and what they mean, as well as the Chinese characters on some of the lanterns we colored and what they mean. I think this activity is a great way to discuss these decorations and the meaning behind them.

In case anyone is curious, the characters on the lanterns we colored mean "love" (ài, ) and "peace" (hépíng, 和平).

Tuesday, January 17, 2012

January Unit Study: Chinese New Year

I didn't blog much about our November and December school with the boys since we did less "official school." We had a wonderful time when my parents visited and celebrated Thanksgiving and Christmas. We did a lot of special stuff together to get ready for, celebrate, and focus on the real meaning of the holidays, and those we're our "unit studies" for those months. There are so many things I appreciate about home schooling, but I think one of the best is how easily life and learning blend naturally through the day. And if we're too busy to do to much of anything, reading the Bible and spending time together as a family is plenty of learning for our little guys.

Anyway, we've already started doing some extra activities in January to learn even more about China and about Chinese New Year. Chinese New Year is actually not called that in China. They call it Spring Festival. But it is China's biggest holiday. We're talking a bit about the origin of this festival and things they do to celebrate it with our boys. We're using some printouts from abcteach.com about China and Chinese New Year. We may also try some of these and other crafts. We also get to experience a lot of things like the amount of fireworks being lit off in a city first hand this year. I'll be writing more about individual activities and the celebration in general in the next few weeks.

Monday, January 16, 2012

Mandarin Mondays: Spring Festival (春节)

Spring Festival (Chūn jié, 春节), known as Chinese New Year in the West, does not officially begin until the evening of January 21st, but the preparations are already gearing up. All of the stores have special gifts on display. People are buying special food and gifts to take back on their journey to their hometowns. Everyone is cleaning their houses top to bottom to rid them of bad luck and decorating them with lots of red decorations to bring in good luck, and most women have new hairdos to start out the new year on the right foot.

And perhaps the part of the celebration that Spring Festival is most famous for, the fireworks (yān huā, 烟花) have already begun. People have already begun setting off firecrackers (fàng biān pào, 放鞭炮) and lighting off fireworks (fàng yān huā, 放烟花) throughout the day and into the night. It is a little noisy now, but I'm guessing next week will be really noisy. This will be our first Spring Festival in China, and I think it will be an interesting experience to see all of the celebrations that go along with their biggest holiday. I'll be writing more about the festival over the next few weeks.

Happy New Year! (xīnnián kuàilè!, 新年快乐!)

Sunday, January 15, 2012

Handcrafted Wedding Favors: Happy Tears Handkerchiefs

In searching for ideas to incorporate into our wedding, I found so many wedding favors that I loved that we actually had quite a few different wedding favors given out at our wedding. But we hardly spent any money on them because we chose to make most of them ourselves (with lots of help from our wonderful family). One of my favorites is this handkerchief for happy tears.

To go with our wedding colors, we choose to make two different sets of handkerchiefs one in lavender (for women) and one in silver gray (for men). We didn't think the guys would really like the lavender ones that much, but you could just choose one more neutral color to simplify things as well.

I had bought a lot of white fabric really inexpensively to use for making table cloths and decorating for the wedding, so I just used a little of this to sew the handkerchiefs. Since I wanted to make 200 of these, I made this a pretty quick sewing project. I cut 9 inch squares out of white muslin. Then I folded the edge over about 1/4 inch over as I was sewing and zigzagged around all sides in contracting thread. When I zigzagged, I sewed very close to the edge allowing the needle to go over the edge every other zigzag. I thought this was a quick way to finish the edges nicely with a decorative touch.

If you had more time, folding the edges over twice would probably look slightly nicer and last a little longer. But even though the edges had a few loose threads that came off the first few washes, we are still using the extra handkerchiefs on a daily basis more than 4 years after our wedding. There were quite a few left over, so as an added bonus, we now have a lot of cloth hankies to use instead of Kleenex, and they are holding up great.

If you could find a great deal on small handkerchiefs you could eliminate the sewing step entirely if you wished. Or you could find someone else who like to sew and wanted to do this a wedding gift or for a reasonable price.

For the next step, we enlisted the help of two of our grandmothers. My husband had created a special letter, kind of like a combined monogram that was an A (for Anna) and a N (for Nate) together. You could of course just use a regular monogram or other small symbol as well. This special letter was used in many things for our wedding, and we asked our grandmothers to embroider it in the corner of each handkerchief. I gave each one completed handkerchief, and the pattern to fit in the corner and trace on each handkerchief. I think our grandmothers were actually quite happy to help and be apart of our wedding in this way.

Lastly, we folded each handkerchief so all points pointed in, with the embroidered corner on top. We made our own wedding programs that had pockets in the front and back for favors, so on the front pocket we had printed the message "For happy tears." Alternately, you could print this message on a small piece of card stock and tie it onto the handkerchief with a ribbon.

A Handcrafted Wedding Series

I liked making things myself long before I was a mom. As we prepared to be married, my husband-to-be and I wanted our wedding to be extremely special, but not extremely expensive. We wanted our wedding to be be about all God has done for us and how He brought us together as part of the plan for our lives. We wanted to make it clear that we were fully committed to this covenant and plan on keeping our vows for life. We wanted our wedding to be remembered for these things, not that we had spent a lot of money for a huge party one day.

So, we set about figuring out how to make our wedding fantastically frugal. We were able to incorporate so many personal touches by doing much of the work ourselves, with a lot of help from friends and family. Remembering our wedding day is such a joy because we were able to have a ceremony and reception so perfect for us, without spending a ton of money.

As I have time, I am going to be writing A Handcrafted Wedding Series. It is my hope that others might be inspired to created their own uniquely fantastic and frugal wedding. I will try to keep this page updated with all the wedding related posts.

Wedding Favors

Saturday, January 14, 2012

DIY Cookie Puzzles

I thought that cookie puzzles sounded like a really cute stocking stuffer, but they could also make a sweet Valentine, Easter present, party favor, or small gift for any other occasion. When we were making sugar cookies together, I cut out a few huge heart shapes. Then I simply cut these large cookies into a few pieces using a butter knife. I separated the pieces slightly and then baked the cookies as usual. Putting colored sugar on top before you bake them or frosting them after they have been baked and cooled would be cute as well. Varying the shapes and colors used could make these appropriate for any occasion. I simply wrapped these in plastic wrap, but you could package them up in cut cellophane bags, small boxes, or small cookie tins too.

Friday, January 13, 2012

Family Fridays: Finished Already?

Nate finished his second semester of Mandarin classes today. It is kind of hard to believe. The last time we lived on this side of the world time seemed to crawl by—this time it's flying. Maybe its Andrew's fault. Time has been flying every since he was born. I think I'm still in shock that he is two years old already.

We're so thankful for all own friends here and how we've been able to settle into life here easier this time. We're looking forward to a little break before Nate starts classes again. There is Chinese New Year (a.k.a Spring Festival here) starting soon. Then we'll be doing a little extra English teaching. After that one of Nate's friends that he's known since elementary school is coming to visit.

I'm thinking time won't seem to slow down anytime soon. I guess that's okay.

Thursday, January 12, 2012

DIY Oreo Truffles Pops

Kids seem to think everything is better when it comes on a stick, and sometimes this keeps both them and their food slightly cleaner. So for some pretty easy stocking stuffers, I took a few of the Oreo Truffles that I had made and made them into Oreo Truffle Pops. I simply made up a batch of Oreo Truffles and then poked a stick into the bottom. Actually, I used some of the tiny straws that sometimes come with our bags of milk here because I am cheap and have no idea where to buy lollipop sticks here. But if you happen to have a Michaels or Hobby Lobby nearby, you should be able to buy actual lollipop sticks if you want to.

You could also try inserting the stick before freezing the chocolate filling and then dipping them in chocolate. Then you can poke the stick into a piece of styrofoam to hold it upright while it drys, similar to cake pops. This would make them more round but a little more tricky to work with. My little kids don't care if their chocolate lollipop has a flat bottom or not, so I just went the easy route of inserting the stick after they had already been coated in chocolate and hardened.

Wrap in cellophane or plastic wrap, and tie with a pretty twist tie or ribbon, and you will have a beautiful stocking stuffer, Valentines treat, party favor, or small sweet gift for any other occasion.

LinkWithin

Related Posts Plugin for WordPress, Blogger...