Tuesday, December 13, 2011

DIY Amazingly Delicious, No Corn Syrup, Caramel Sauce

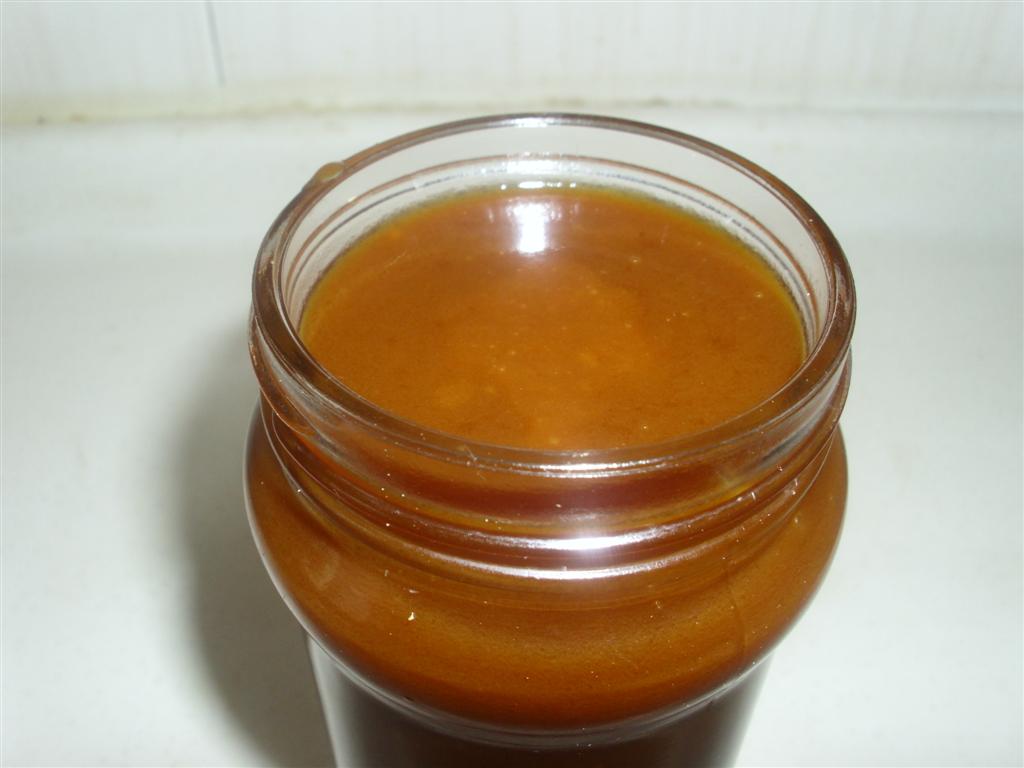
I absolutely love really good, homemade caramel. Next to chocolate, it is probably my favorite flavor sweet; although really good coffee is definitely up there too. But there is something about homemade caramel that is so different than store bought. I think it is the pure caramelized sugar, butter, and cream without anything else added that makes it so good. Anyway, this caramel sauce is incredibly amazing. It is great on apple pie, on or in ice cream, on in brownies, in coffee, or just eaten with a spoon. This sauce would make a great gift in an ice cream sundae kit, paired with another dessert or coffee, or a great stocking stuffer or hostess gift all by itself.


Homemade Caramel Sauce Recipe

  • 1 1/2 cups white granulated sugar
  • 1/4 cup (4 Tbsp) butter
  • 1 cup heavy cream
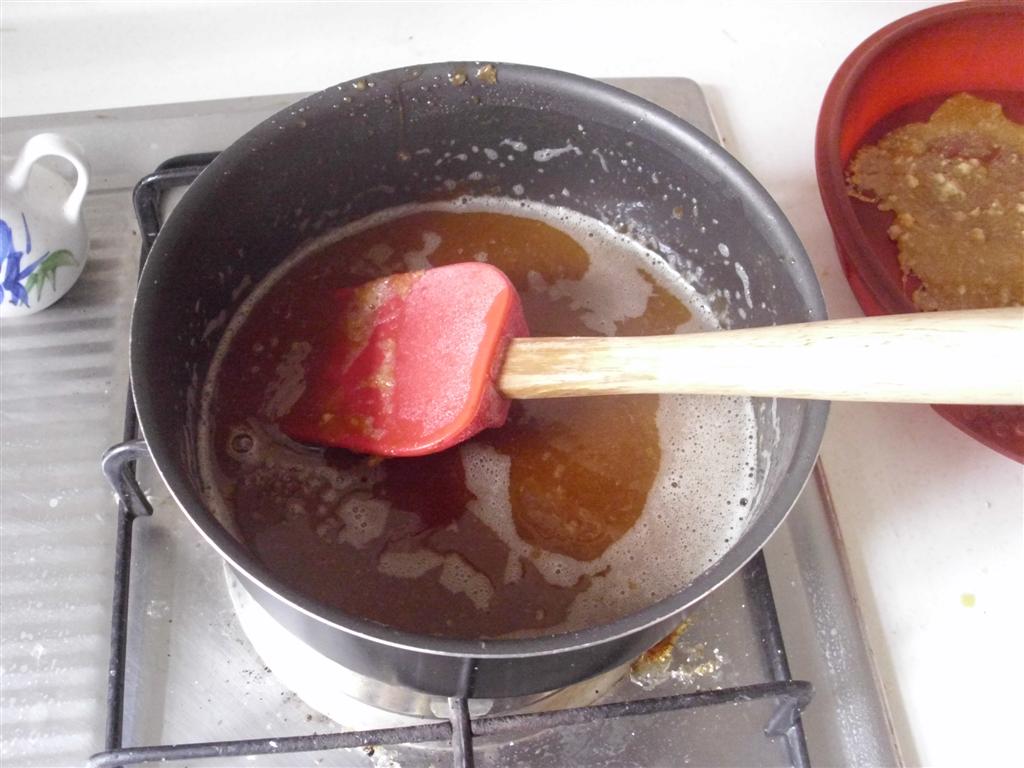
  1. Begin by placing sugar in a medium to large saucepan over low heat. Even though this recipe only makes about 1 pint of sauce altogether, you need a much bigger saucepan because the caramelized sugar will bubble and foam up a lot when you add the butter and cream, and you don't want to get burned.
  2. Melt all of the sugar completely, stirring and swirling the pot as necessary to keep it from burning. Be aware that too much stirring can make the final product a little lumpy.
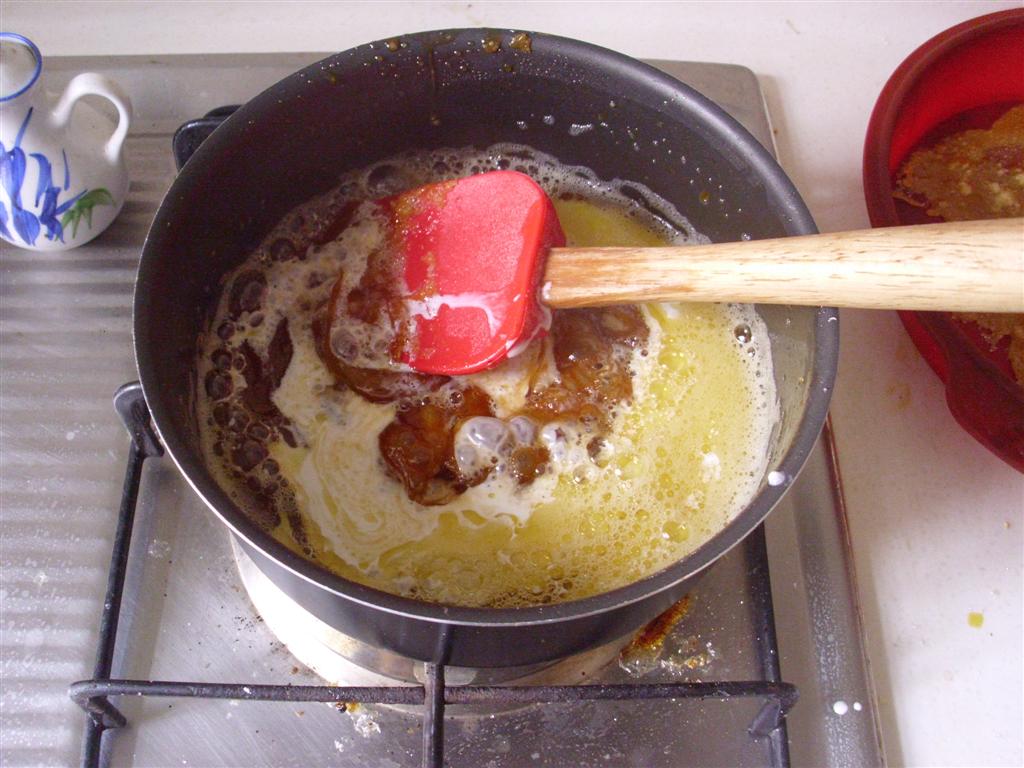
  3. Once all of the sugar is melted, add the butter carefully and stir to combine. Some of the caramel may harden and seize, but if you just keep stirring it over low heat, it will melt into liquid again.
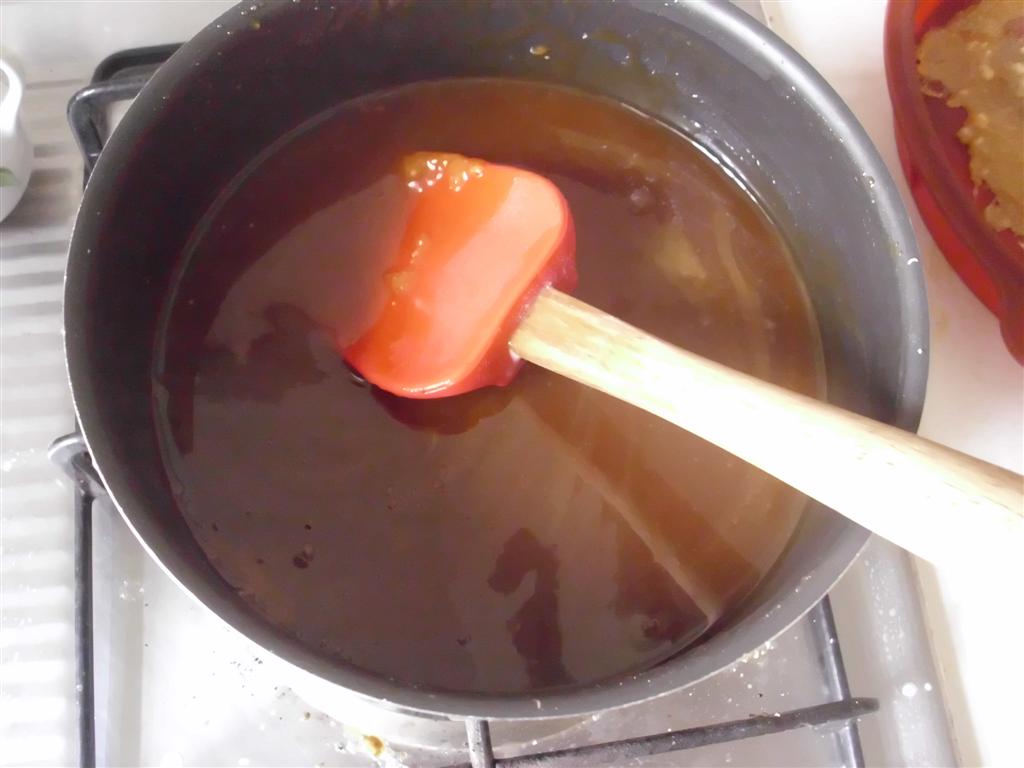
  4. Then add the cream a little at a time because this is when the mixture will really bubble up. The caramel will harden again, but just keep stirring over low heat until it melts. Cook and stir until the mixture is well combined, and then turn off heat, and allow to cool. Cooking down the mixture a long time will result in wonderful chewy caramel candy, but if you are looking for sauce, you may not find that quite as wonderful.
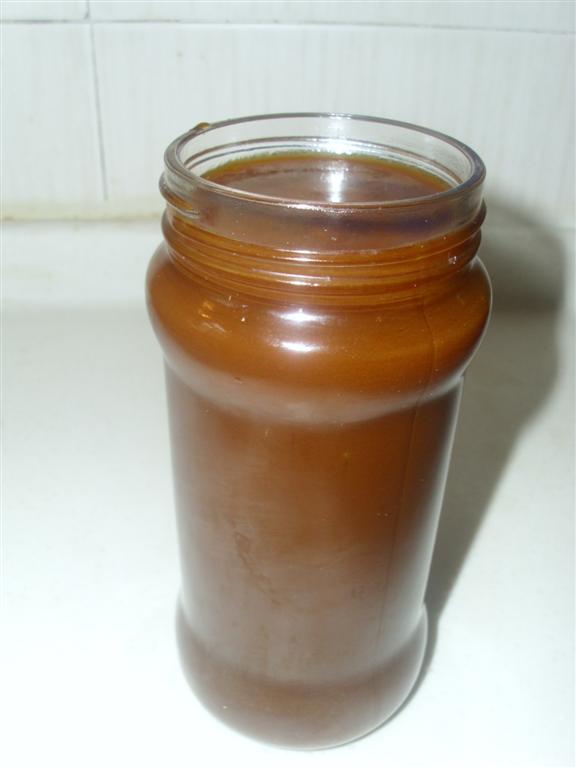
  5. Pour over your favorite dessert or into a glass jar, and refrigerate for later.

    DIY Christmas Gift Ideas: Bubble Bath

    I was having trouble thinking of things to make Andrew for his birthday, but I thought he would like some new things for bath time. So when I came across this blog post where Laura is having the same dilemma for a little bit older son, I thought this was a perfect idea. The basic recipe requires very few ingredients, although you can customize it more with additional scents and colors if you like. I put a sticker on the plastic bottle to make it Pooh-themed to match our soon-to-be two-year-old's birthday party theme, but you could easily make this gift appropriate for an adult too, simply but making the presentation more elegant. This would make a great inexpensive gift or stocking stuffer for a wide variety of people.

    Homemade Bubble Bath Recipe

    • 1/2 cup shampoo
    • 3/4 cup water
    • 1/4 tsp salt
    • few drops essential oils (optional)
    • few drops food coloring (optional)
    Mix the shampoo, water, and salt together in a bowl (or in the bottle) until the mixture thickens together. Add any extra essential oils or food coloring if desired.

    Monday, December 12, 2011

    Mandarin Mondays: 饺子

    While my parents were here, we took them out for some of our favorite Chinese food: jiǎo zi (饺子) and bāo zi (包子). Jiǎo zi is usually translated as "dumpling," but they are more like our meat filled ravioli. They can be boiled, fried, or steamed. Traditionally, you can dip them in vinegar (cù, ), soy sauce (jiàng yóu, 酱油), or hot pepper sauce(là jiāo jiàng, 辣椒酱). Bāo zi (包子) are steamed buns that can be filled with meat (ròu, ), vegetables (shū cài, 蔬菜), or sugar (táng, ). Everyone had fun practicing using their chopsticks (kuài zi, 筷子) to eat them with. The boys are getting better and better at it.


    DIY Christmas Decorations: Easy, Low Sew, Pocket Advent Calendar

    I realize this is a little late for anyone to be making advent calendars this year, but I made mine a couple days late, and we've been enjoying it ever since then. I simply cut 4 inch squares out of a variety of green fabrics and one brown square for the trunk (Christmas Day). I arranged them in a pattern to resemble a Christmas Tree and hand sewed them on. I have been embracing frayed edges and uneven stitching in our holiday decorations, but you could finish these much nicer if you prefer. I then used fabric paint to paint on 1–25 for the days of the month, but you could embroider, sew on number beads or decals, iron number transfers on, or even just write them on with a sharpie.

    The choice of fabrics and how you do your numbers could totally change the look of this calender for any decor.

    My husband and I are working on writing a Jesse Tree devotional book for our family this year and I am putting each day's symbol ornament in the pocket for that day. But you could put treats, a verse, a family activity, or even an act of service in each pocket for other ways to celebrate the season. The boys really like our advent calendar, especially because we combine it with a treat in their Christmas stockings as we count down the days to Christmas.

    DIY No-Bake, No Corn Syrup Crunchy Caramel Corn

    I really like caramel corn, but I am really horrible at baking it. Somehow I always managed to burn at least part of the batch. I am not really sure how, but some always burns. So after learning how to make simple hard caramel candy, I got to thinking...what if I could make caramel corn using this caramel? I tried it yesterday, and it worked great. No baking and minimal ingredients required. It is the easiest way I have ever tried or seen to make caramel corn. The only trick is to make sure to spread the popcorn out well, drizzle the sauce over it, and then stir and spread it really fast so it doesn't all clump together when it hardens.

    Homemade No-Bake, No Corn Syrup Caramel Corn Recipe

    • 6-8 cups popped popcorn
    • 1 cup sugar
    • Salt if desired
    1. Pop the popcorn using your preferred method. I pop mine in sunflower oil on the stove top and then sprinkle on a small amount of salt.
    2. Spread popcorn out in non-stick baking dish (like silicone) or in a baking sheet lined with a Silpat or buttered (or oiled) parchment paper.
    3. Melt the sugar in a small saucepan using the method described here.
    4. Once all of the sugar is entirely melted and caramelized, pour over the popcorn and stir quickly to coat. You can add even more salt now if you like. Let cool and you're done!
    5. Eat once cool, store in sealed containers, or package it up for gift giving.

      DIY Christmas Decorations: Pine Cone Window Treatments

      When we moved around the world by airplane, we decided not to pack non-essentials, like our Christmas decorations. So this year, I have been having fun making our own Christmas decorations with things we already have, or found, and things from nature. My goal is to have a few simple beautiful Christmas decorations to decorate our house with for free. We have a great big curved window in the front of our living room that I thought I try to decorate with some pine cones Nate and Aaron gathered for me.

      Homemade Pine Cone Window Treatments


      • Pine cones
      • Thread or fishing line
      Simply cut lengths of thread or fishing line, tie one end to the pine cone, and then tie the other end to your curtain rod or tape it to the wall. Vary the height of the pine cones for visual interest.

      I really like how the pine cones look, simple and beautiful.

      Friday, December 9, 2011

      Family Fridays: Fun We Had with the Grandparents

      I'll write more in depth later about some of the things we did, but for now here is a lot of random fun things the grandparents and grand kids did together. They sure had a lot of fun. We hope to see you again soon, and enjoy Skyping and visiting with all our family.
      Yea for McDonald's!

      Aaron building a train with his new blocks.

      Andrew fell asleep on Papa.

      Building at Toys Я Us

      Making apple and pumpkin pies with Grandma

      Cutting out sugar cookies

      Knocking Grandma down

      Grandpa throwing Aaron up

      Thanksgiving chase around the table

      Reading with Papa

      Visiting the big Thomas at Toys Я Us

      Waking Papa up

      Walking with Papa

      Holiday Fun with Kids: Cutting Out Sugar Cookies

      One of my favorite holiday traditions is cutting out sugar cookies with family. I can remember making cookies and gingerbread houses with my mom and grandmas as a little girl, and now it is fun to make them with my own kids. So I really wanted to make sugar cookies when my parents came to visit for Thanksgiving. I think everyone had a lot of fun. I found a great recipe, and the boys had fun cutting out cookies for a while. We used all the shapes we had, mainly shapes from their shape sorter toy that we thoroughly washed first. Grandpa John even got really creative cutting out Christmas Tree shapes free hand.


      DIY Sugar Cookies

      We made this sugar cookies when the grandparents were here. It was a lot of fun, and this is a great sugar cookie recipe. I am pretty sure it was the real butter that made them the best sugar cookies ever, but the original recipe said to use margarine, so you can use that if you prefer. I also added Grandma Shirley's secret sugar cookie ingredient (nutmeg) which rounds out the flavors nicely.

      Homemade Roll Out Sugar Cookie Recipe

      • 3 3/4 cups flour
      • 1 1/2 cups granulated sugar
      • 1 cup butter or margarine softened
      • 2 eggs
      • 1 tsp baking powder
      • 1/2 tsp salt
      • 2 tsp vanilla extract
      • 1 tsp nutmeg
      1. Cream together butter and sugar.
      2. Beat in eggs and vanilla.
      3. Add dry ingredients, incorporating flour about 1 cup at a time.
      4. Chill in the refrigerator a couple of hours or overnight. I did find that with all real butter though I had to let the dough soften up a bit after chilling it overnight.
      5. Roll small sections of dough at a time to 1/4 inch thick. Cut into shapes with cookie cutters and place on an ungreased baking sheet.
      6. Bake at 400F for 6-8 minutes, until edges just begin to brown.
      7. Remove from cookie sheets immediately, and cool on wire racks or clean counter top.

        Thursday, December 8, 2011

        DIY Stocking Stuffers: Chocolate Covered spoons


        I started filling the boys stockings on December 1st and let them open one present each night until Christmas Day, when they can open the rest of their presents. So I've already been working on small treats for them. These small chocolate covered spoons are a great tiny chocolate treat for little kids who love to lick the spoon. They are also great to include in a gift basket with coffee or hot chocolate, as chocolate stirring spoons that add extra richness to the drink. If you could find inexpensive mismatched teaspoons at a second hand store that might be a beautiful non-plastic option for drink stirrers, if you are worried about plastic leaching into the hot drink.

        To make these, you simply melt some chocolate, dip the end of the teaspoon in, and let dry on a baking pan on parchment paper before wrapping in cellophane or plastic wrap and tying with a pretty twist tie, ribbon, or string.

        LinkWithin

        Related Posts Plugin for WordPress, Blogger...