.jpg)

Monday, August 26, 2013
Monday, August 19, 2013
.JPG)
.JPG)
Saturday, August 17, 2013
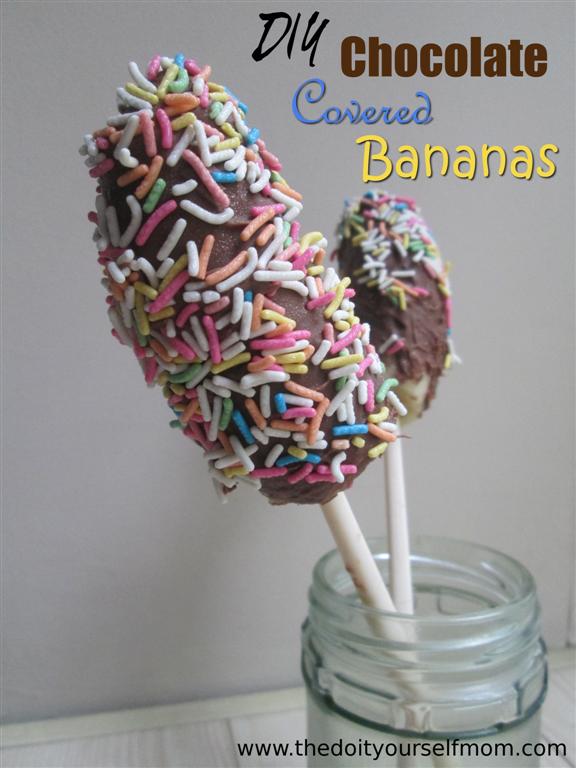
DIY Chocolate Covered Bananas
.jpg)
So this isn't so much of a recipe, as an nudge to go make this quintessential summer treat. My kids loved the experience of making and eating these creamy chocolatey wonders.
Homemade Chocolate Covered Frozen Bananas Recipe
- 5-7 Bananas
- 1 (12 oz) package chocolate chips
- sprinkles or nuts (optional)
- Cut bananas in half and place on popsicle sticks (or in my case chopsticks). Place in freezer at least 30 minutes or until frozen. (At this point you have all natural, 100% fruit banana popsicles, perfect for an everyday treat. Also great for the teething baby in the house. But if you want to make something really special carry on.)
- Melt chocolate chips carefully in a double boiler or microwave.
- Dip frozen bananas in chocolate. I spread the chocolate around some of them with a spatula too.
- Dip in sprinkles or nuts if desired. (This was my boys favorite part!)
- You can eat them immediately, but they hold together a little better if you return them to the freezer for at least a few minutes. Once frozen you can also wrap them up and save for later.
.jpg)
.jpg)
.jpg)
.jpg)
.jpg)
.jpg) |
| It's funny, I didn't realize there was a goat in the kitchen until now. |
.jpg)
.jpg)
.jpg)
.jpg)
.jpg)
Monday, August 12, 2013
.JPG)
.JPG)
Alexander at 10 Months
.JPG)
At 10 months Alexander:
- Is 22.75 pounds and 30.75 inches
- Wears 12-24 month clothes
- Loves to be a part of everything, even trying to "help" with chores
- Is a chatterbox who loves to babble constantly
- Says mama, dada, nigh-nigh (night-night)
- Waves hi and bye, signs milk, more, and occasionally diaper
- Gets himself into and out of sitting position easily, so it is more fun for him to play sitting for a couple of minutes
- Loves to eat pretty much everything. In one meal he can eat a whole egg or banana or piece of pizza.
- Is doing a little better about not constantly getting into everything
- is getting better at entertaining himself/playing by himself for a little bit
- Loves to learn
- Loves attention and affection, will come up to us just to give a hug and kiss
.jpg)
.JPG)
.jpg)
.JPG)
+(Large).jpg)
.jpg)
.jpg)
.JPG)
.JPG)
Friday, August 9, 2013
DIY Key Lime Pudding
.JPG)
We are loving all things Key lime here and this pudding is amazing. This pudding is very thick and rich, almost like pie filling. I think that sometime I am going to try making a Key lime pudding pie out of this recipe.
I made this to include in a Key Lime Trifle back in June for Father's day, but this pudding would make a great dessert all by itself warm, cold, or even frozen as frozen custard or pudding pops.
I made it the night before and it kept well in the fridge. I wouldn't making it much farther ahead of time though, mainly because I kept wanting to eat it all right away.
Homemade Key Lime Pudding Recipe
- 1 cup sugar
- 2 1/2 cups milk (divided
- 1/3 cup cornstarch
- 3 egg yolks
- 1/3 cup Key lime juice
- 3 Tbsp butter
- In a small mixing bowl, begin by stirring together ½ cup milk, egg yolks, and cornstarch until well combined.
- In a medium saucepan, combine 2 cups milk and sugar.
- Stir over medium heat to warm the milk.
- Take a couple of big spoonfuls (¼ to ½ cup) of the warm milk mixture, and add it into the cornstarch and egg mixture. Don't skip this step. This tempers the egg and prevents it from becoming a scrambled egg when adding it into the hot milk.
- Pour the cornstarch and egg mixture into the warm milk, and stir quickly to combine well.
- Continue to stir over medium heat until the pudding thickens and begins to bubble.
- Turn off heat. Add Key Lime juice and butter. Stir until well combined.
- Strain if necessary/desired to remove any lumps.
- You can serve this pudding warm (sounds good in the winter) or chill for at least 2 hours and serve it cold. I would imagine it would make lovely frozen custard as well.
.JPG)
.JPG)
.JPG)
Monday, August 5, 2013
.jpg)
Monday, July 29, 2013
.jpg)
Thursday, July 25, 2013
DIY Key Lime Pie Ice Cream
.jpg)
Because the lime curd adds extra sugar and butter, this is by no means a diet recipe, but works much more easily than most recipes to freeze and keep in a regular freezer. It stays softer and creamier. I'm thinking all homemade ice cream could be improved with butter since this Key lime pie ice cream and this caramel ice cream are both so amazing. When in doubt, add butter.
Key Lime Pie Ice Cream Recipe
Key Lime Curd
- 1 cup sugar
- 3 eggs
- 1/3 cup fresh Key lime juice
- 1 Tbsp freshly grated key line zest
- 1/4 cup butter cubed
- Combine eggs and sugar in a sauce pan or double boiler. Then stir in lime juice and zest.
- Simmer in a sauce pan or double boiler for 10–15 minutes or until thickened.
- Pour through a strainer to remove any egg white particles if necessary/desired.
- Add cubed butter and stir until melted and well incorporated.
- Allow to cool; the curd will continue to thicken.
Vanilla Custard
- 3/4 cup sugar
- 1 1/2 cups whole milk (divided)
- 4 egg yolks
- 3/4 cup heavy (whipping) cream
- 1 tsp vanilla
- Get out all of the ingredients, as well as a saucepan, a small bowl, a mixing bowl, a whisk, a spatula, measuring cups, and spoons.
- Begin heating 1 cup of milk and sugar slowly in a saucepan. Whisk egg yolks, and begin adding some of the warm milk mixture to the egg yolks. When the egg yolk mixture is warm, add it into the milk mixture, and continue heating over low heat, stirring frequently until the custard thickens enough to coat the spatula or spoon.
- Pour 1/2 cup milk and 1 cup cream into the mixing bowl. Add the custard into the milk and cream. If the custard has any lumps, pour through a strainer when adding it to the milk and cream. Add vanilla, and stir well.
You can either mix in graham cracker bits (store bought or even homemade) and/or toasted coconut to the ice cream while it is freezing, while it is still slightly soft, or simply add any desired garnish(es) right before serving.
Makes 1 generous quart/liter/
.JPG)
.JPG)
.JPG)
Tuesday, July 23, 2013
DIY Key Lime Curd
.jpg)
This Key lime curd is so good on just about any everyday bakery product and in special desserts. If you ever need to have a tea party that feels formal just set out lemon or lime curd, whip cream, and maybe some other sort of fruit jam to go with basic scones and everyone will ask out how you got so good at throwing tea parties.
Homemade Key Lime Curd Recipe
- 1 cup sugar
- 3 eggs
- 1/3 cup fresh Key lime juice
- 1 Tbsp freshly grated key line zest
- 1/4 cup butter cubed
- Combine eggs and sugar in a sauce pan or double boiler. Then stir in lime juice and zest.
- Simmer in a double boiler for 10–15 minutes or until thickened.
- Pour through a strainer to remove any egg white particles if necessary/desired.
- Add cubed butter and stir until melted and well incorporated.
- Allow to cool; the curd will continue to thicken. Spread on a cooled cake, muffins, or enjoy on scones or toast.
.JPG)
.JPG)
.JPG)
Subscribe to:
Posts (Atom)