Saturday, February 9, 2013

Chinese New Year Preschool Craft: Firecracker Decorations

Chinese New Year (which is actually called Spring Festival in China) festivities are underway here. Today is "New Year's Eve" and the actual Lunisolar New Year Day is tomorrow. This will start the official two weeks of the festival, but really people have been celebrating for at least a week and there are generally festivities for a month or more surrounding the holiday.

During this time there are lots of firecrackers and fireworks going off all over, even in cities where they are less prevalent in general. Today we've heard a lot more than usual and tomorrow night will probably be the biggest firework day of the year (if I remember right from last year).

Updated February 10th:
We learned later that we were kind of confused on the dates. The actual New Year's day this year was February 10, but the festival starts New Year's Eve, so people refer to this as the start of the holiday. So anyway, the biggest firework day is the New Year's Eve night into the New Year's Day. Last night/this morning there was definitely a huge amount of fireworks at midnight. I think we figured out our confusion on this subject now on to other cultural mysteries.)

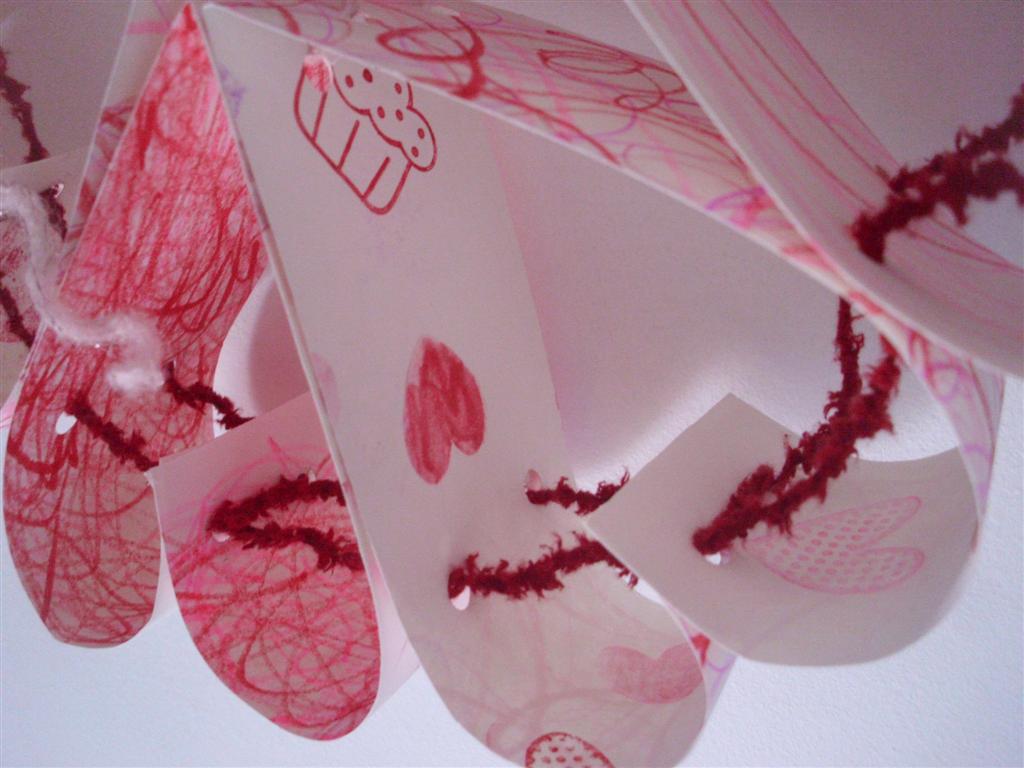
In addition to lighting off fireworks, firecracker decorations like this one are all over as well. A few days ago we made this simple hanging firework decoration. We don't in any way believe we need real or decorative fireworks to scare away bad luck or vampires, but I thought this would be a good way to explain to our boys that some people here do believe that. That is why they buy and use those things, and why we don't. (Besides the strong focus of visiting with family, the big emphasis of this holiday is good luck for the New Year, and pretty much everything surrounding this holiday has to do with either inviting good luck or keeping bad luck away, so we can't really do anything related to Spring festival without addressing it.)

We also got a lot of tracing practice writing the Chinese characters for firecracker (biānpào, 鞭炮) on each firecracker. If you didn't want to write the characters you could just decorate the red paper with black and/or gold designs as well.

Street-side cart of firecracker and other decorations

Spring Festival Firework Decorations


  • Red scrapbook or construction paper (I cut up a red gift bag with a swirly design that had torn a little, but any sturdy red paper would work)
  • Pencils, pens, markers, or even glitter glue pens
  • Scissors
  • Stapler and staples (or tape could work)
  • String to hang
  1. Cut small rectangles of red paper (mine were about 3x5 inches).
  2. If you want you can write the Chinese character for firecracker (biānpào, 鞭炮) one each piece of paper and have your child trace over it. Or you could have an older child try to write it on their own. Or you can skip the character and just make designs in black or gold.
  3. Curl each piece of paper around to make a small tube and secure with a staple or piece of tape.
  4. Cut some lengths of string and attach on to each tube.
  5. Tie the tubes together at varying heights and hang. 
 If you want you can practice saying, biānpào. The pow sound with the strong falling tone almost sounds like a firecracker, which helps me remember it. :)


Friday, February 8, 2013

Alexander at 4 Months

Another month has passed quickly and Alexander is 4 months old. Growing quickly he is now 16 pounds 10 ounces and 27 inches long.

At four months:
  • He is starting to grab toys and put them in his mouth.
  • He definitely notices and plays with his hands a lot.
  • He notices and tries to grab his feet often, but he still seems quite surprised that they are there the next time he sees them.
  • He loves when his brothers talk and read to him and play nearby him.
  • He loves attention! He even like diaper changes and baths most of the time because someone is paying attention just to him. :)
  • He is still doing fine on just a milk diet, but is very interested in food. He has really liked the few licks of apple and pear he has had.


Thursday, February 7, 2013

DIY Paper Heart Wreath (Valentine's Decoration and Preschool Craft in One!)

Much like our paper heart garland, this is another pretty Valentine's decoration that I adapted from a picture perfect version to make it into a preschool activity for my two boys (4 1/2 and 3 years old).

We also don't have any scrapbook paper and I didn't want to waste printer ink on this project, so I came up with a different way to make the decorative paper. This added another element that small kids can do easily as well.

Homemade Paper Heart Wreath


  • Paper
  • Markers, crayons, or colored pencils in Valentine's colors of your choice
  • Stamps and ink pad (you could use stickers or something else to decorate the other side as well)
  • Hole punch and string (Or some other way to fasten the hearts together like glue, tape, or even staples)
  • Tape and or a straw to make a needle for the string (optional)

    1. First we decorated our paper. We stamped Valentine related stamps on one side and scribbled a lot of reds and pinks on the other.


    2. Then I cut the strips, about 2 inches by about 14 inches, and folded the strips in half. I folded half of the strips with the stamp side out and the other half with the scribble side out.

    3. I punched two sets of holes at the top and middle. Later I discovered I needed another set of holes at the bottom to stabilize the wreath.
    4. Then we strung them together. First we curled the top ends around so the outsides went in and touched each other forming a heart.
    5. Then starting at one side sew through the heart, looping it through both the middle holes to secure the top of the heart together, and then out the other side. Sew through all of the holes on one side of the heart this way and then go back through the other side. Then sew through the holes at the bottom of the heart.


    6. Tie ends of string together and make a loop to hang.


    Wednesday, February 6, 2013

    DIY Strawberry Scones

    One of the interesting things about living in this part of southern China, is that our strawberry season is in the winter. In the summer it rains a lot, but in the winter it is usually quite dry and sunny. So now is the time to make all things strawberry here.

    These strawberry scones turned really good. I had to quick freeze a few for Valentine's Day or they would have all disappeared the first day. The strawberry icing really brings out the strawberry flavor.

    To make the rest of the recipe really easy first wash and hull strawberries and puree enough in a blender to equal 1 cup of strawberry puree to divide for the recipe. If you puree too much you can always make smoothies. :)

    Homemade Strawberry Scones


    • 2 1/2 cups flour
    • 1/2 cup sugar
    • 3/4 cup strawberry puree
    • 1/2 cup oil or melted butter
    • 1 egg
    • 1 Tbsp baking powder 
    • 1 tsp vanilla
    1. Mix all ingredients together in a large mixing bowl until well combined.
    2. Divide dough in two, and press or roll out into circles (or a giant rectangle on a 9x13 pan) on greased pans until about 1/2 inch thick. (Here are more pictures of making scones.)
    3. Score into about 16-18 total triangle-shaped scones.
    4. Bake at 400 F for about 15 minutes until just lightly brown.
    5. Remove from oven, and let cool.
    6. Make strawberry powdered sugar glaze.

    Homemade Strawberry Powdered Sugar Glaze


    • 1 1/4 cup powdered sugar (approximately)
    • 1/4 cup strawberry puree (approximately)
    1. Mix together strawberry puree and powdered sugar. To get desired consistency it may be necessary to adjust the amounts of wet or dry ingredients. If the icing is too dry and you don't have any more strawberry puree, you can add a little milk a teaspoon at a time also.
    2. Drizzle on top of scones.
    Makes 16-18 scones. 


    Thursday, January 31, 2013

    DIY Fabric Heart Garland

    I've been doing some more sewing lately. After doing some very functional sewing of diapers and mending I wanted a quick and easy project just for fun. This simple heart garland came together really fast and makes me smile.

    Easy Homemade Valentine's Day Heart Garland


    • Assorted fabrics that won't fray easily (I used felted wool and fleece)
    • Sewing machine (although you could do this by hand with a needle, it would just take longer)
    • Thread
    • Scissors
    1. First I cut out a bunch of hearts free hand. The shapes and sizes vary slightly, but I kind of like it that way. I did make the same number of each fabric.
    2. Then I arranged them in the order I wanted to sew them in a big stack. I choose to make a repeating pattern since the shapes and sizes vary some.
    3. Then I sewed  them together using a straight stitch on the sewing machine. I started sewing point first and then just lined the next one up right behind. For them to feed into the machine smoothly, it seemed to work best to sew them point first and over lap them slightly with the next heart just under the one being sewn.
    Once you have sewn all of the hearts together, you can hang it up and smile.


    Wednesday, January 30, 2013

    DIY Strawberry Jam Coffee Cake

    "Why is it a coffee cake, when there is no coffee in it?" wondered my then three-year-old ever inquisitive eldest son when I first made this coffee cake.

    Well, this cake goes great with coffee, but even if you don't like coffee (and my husband hates it) you'll love this cake. It goes great with tea, cocoa, or just by itself.

    Homemade Strawberry Jam Coffee Cake Recipe

    Cake
    • 2 cups flour
    • 1 cup sugar
    • 1 tsp baking powder
    • 1 tsp baking soda
    • 2 eggs
    • 1/2 cup oil
    • 1 cup yogurt
    • 1 tsp vanilla
    • 1/2 tsp almond extract (optional but very good)
    Strawberry Layer
    • 1 cup strawberry jam (homemade or store bought)
    Streusel Topping
    • 3 Tbsp cold butter (cubed)
    • 1/2 cup flour
    • 1/4 cup sugar
    Optional Icing
    • 1 1/4 cups powdered sugar
    • 2-3 Tbsp milk
    • 1/2 tsp almond extract (optional but very good)
    1. In a mixing bowl combine all cake ingredients and mix until well combined.
    2. Spread cake batter in a greased 9x13 pan.
    3. Dot the top of the cake batter with spoonfuls of strawberry jam.
    4. For the streusel topping cut together ingredients with a pastry blender and then sprinkle on top of the cake.
    5. Bake at 350 F for 30-40 minutes or until a knife inserted into the center of the cake comes out clean.
    6. Mix together icing ingredients and drizzle on top of baked cake if desired.
    Makes one 9x13 coffee cake.


    LinkWithin

    Related Posts Plugin for WordPress, Blogger...