Thursday, August 11, 2011

DIY Watercolor Paints

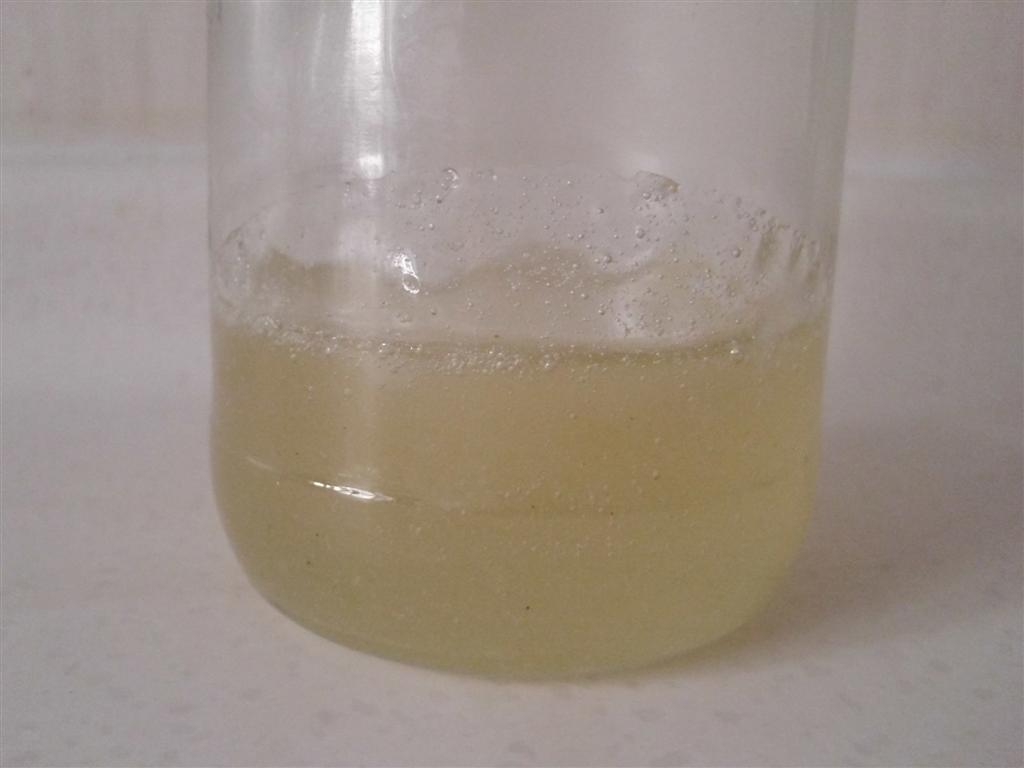
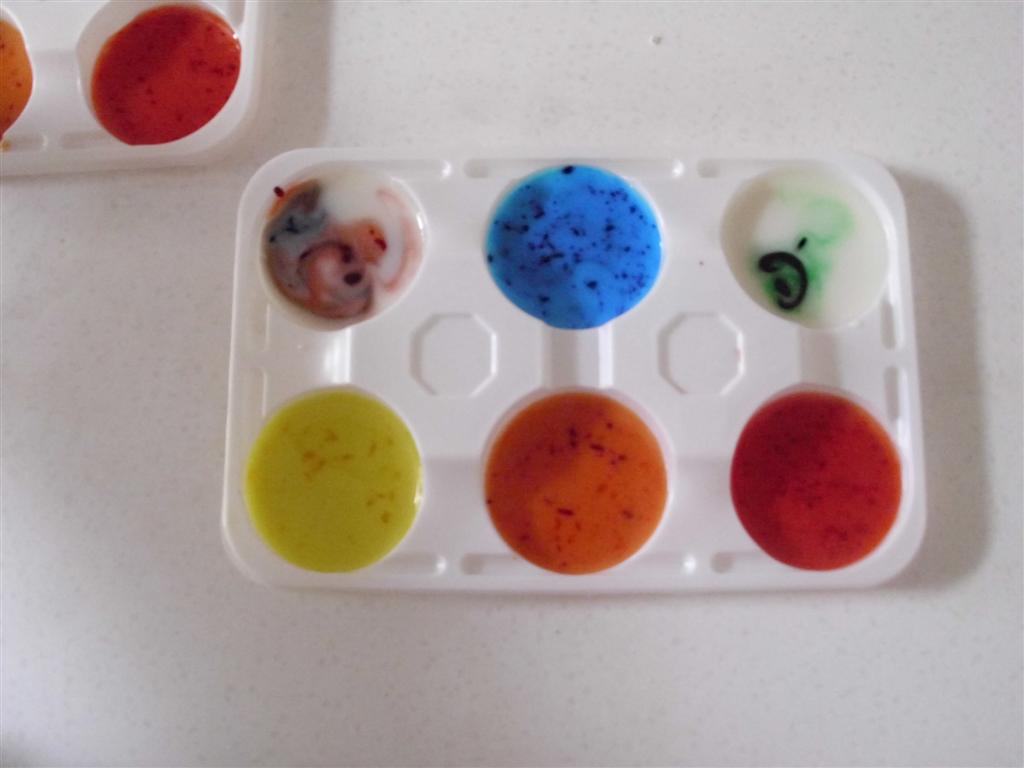
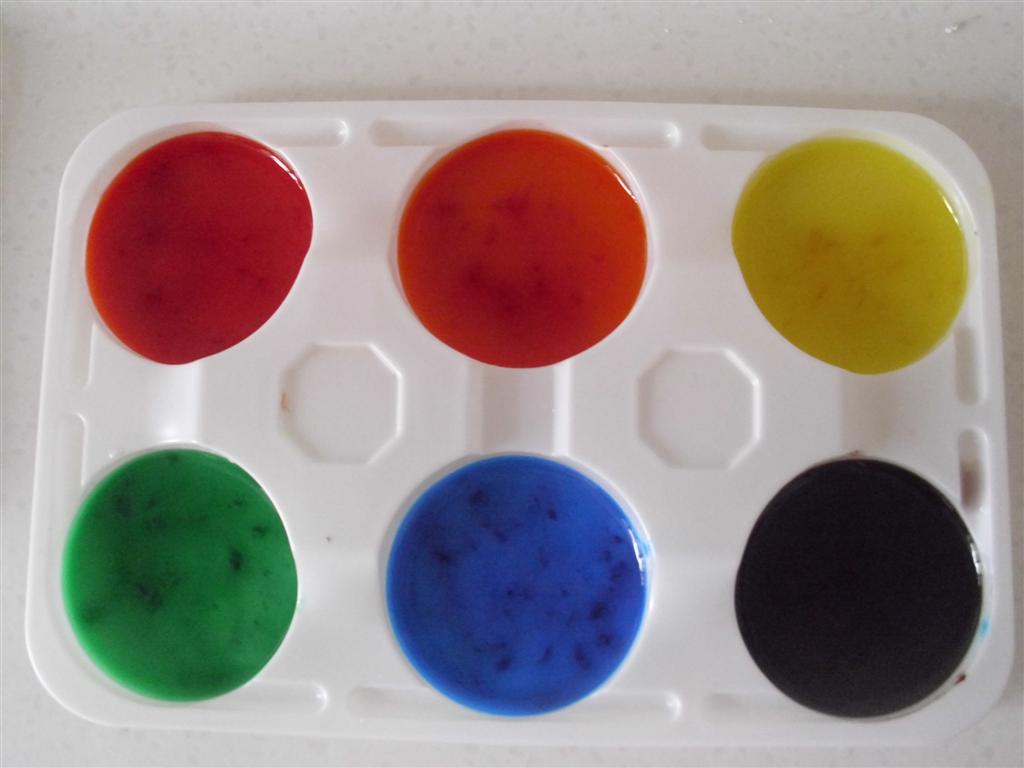
Paint for art projects is another supply that I have put off buying here lest it end up in Andrew's mouth. There are lots of different recipes for all sorts of paints out there. This basic recipe for homemade watercolors can also be found at I Can Teach My Child and lots of other places on the web. I have never tried to make watercolor paints before, but these turned out really well. And just like the glue, I love that these are made with all edible ingredients, just in case. I used a couple of trays that held yogurt cups for a paint tray, but you could use an egg carton, large bottle caps, small cups, or other recycled pieces. Or if you were going to give these as a gift, you could even use a store bought paint tray for really nice presentation.

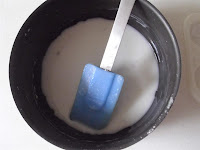
Homemade Water Color Recipe

  • 3 Tbsp baking soda
  • 3 Tbsp corn starch
  • 1½ tsp corn syrup (Homemade works great!)
  • 3 Tbsp white vinegar
  • Food coloring
  1. Put baking soda, corn starch, and corn syrup in a bowl. Add the vinegar. Kids will have fun watching it bubble and fizz up.
  2. Mix well.
  3. Separate into try sections small containers.
  4. Add food coloring for each color desired. The gel food coloring I used made really vivid colors, but did take a while to mix in.
  5. Let the paints dry overnight. (Or use now to make your own paint with water pages and let those dry over night).
  6. The next morning the paints will be thicker and in a more solid state, but they will still be wet to the touch.  They are now ready to use!
  7. Have fun painting, and then cover and store for next time.
I used this recipe to make 12 small amounts of colors (6 for each of my 2 boys), but you can obviously make less colors and have larger amounts.
Both of my boys had a lot of fun painting dinosaurs with these wonderful watercolors. Their finished pictures look really cool.

    Dinosaur Themed Preschool Craft Idea: Popsicle Stick Dino Skeleton

    We're studying dinosaurs this month and doing some fun crafts to go along with our theme. This is our first dinosaur creation: a Stick-a-saurus Skeleton. You can print out your own stick-a-saurus outline from my free dinosaur printables available here.

    Preschool (or Tot-school) Craft Idea: Stick-a-saurus Skeleton

    • Popsicle sticks (for long bones)
    • Q-tips, toothpicks, or cut popsicle sticks (for ribs)
    • A piece of paper (lines to use as a guide for where the sticks go can be drawn or this can be more of an open-ended project, and you can leave the design totally to the child)
    • Small dino head cut out of paper
    • School glue (Homemade works great!)
    • additional Q-tips to spread the glue if desired
    1. Assemble supplies.
    2. Have the child spread the glue on the sticks or on the lines for the long bones, and press into place.
    3. Then glue the ribs and the head on top, and you're done!
    4. The child can name the dinosaur if they want.


    My preschooler, Aaron, (who is three years old) was able to follow the lines and make the dinosaur look really good all on his own. My little guy in "tot-school" Andrew (who is 19 months old) just stuck them all over, which is absolutely fine with me. Gluing and sticking at this age is already kind of advanced, and everyone says his project looks like they just discovered the bones at an archeological site. :)

      DIY School Glue

      Homemade School Glue
      When I saw the idea for making homemade glue over at I Can Teach My Child, I  knew right away that I wanted to try it out. I have been avoiding buying school supplies in China that could easily end up all over Andrew's hands and then probably ended up in his mouth, just to be on the safe side. Now I that I learned how to make homemade corn syrup, I can make this glue whenever we need it. I did end up adapting the original recipe because at first it turned out too thin, but the second time it turned out great!

      Just Like Elmer's School Glue

      • ¾ cup water
      • 2 Tbsp corn syrup
      • 1 tsp white vinegar
      • 2 Tbsp corn starch
      • ¼ cup cold water 
      1. In a medium saucepan heat 3/4 cup water, corn syrup, and vinegar.
      2. In a separate bowl or measuring cup mix ¼ cup of water with corn starch until thoroughly dissovled.
      3. Pour the cornstarch mixture into the other ingredients, and stir well.
      4. Bring mixture to a rolling boil for 1 minute, stirring frequently.
      5. Remove from heat and let cool. (The glue will still be kind of thin when it is hot. It will thicken up gradually as it cools.)
      6. Pour into recycled glue container or jar, and let sit over night.
      7. Use as you would regular school glue. (I didn't have an old glue container to recycle, so I just store the glue in a jar and poured a small amount into a bottle cap for the boys to apply with Q-tips. This method worked well.)
      The boys had lots of fun gluing popsicle sticks together to make dinosaurs with this glue. It is a little more clear than regular Elmer's glue, but it holds just as well when dry.

        Wednesday, August 10, 2011

        Extra Income Earning Activity: Join Swagbucks

        Have you heard about Swagbucks? They are are a online reward company that rewards you for simple things you are probably already doing online. The easiest way to earn Swagbucks is by searching online through their search engine. I search everyday anyway, by searching with Swagbucks I can earn a little extra money; although I still think Google is a better search engine. By searching through the Swagbucks site or using their toolbar you will randomly be awarded Swagbucks up to several times in a day. You can then redeem these Swagbucks for prizes, including Amazon Gift Cards and cash through PayPal.

        They have a lot of other activities that you can also do to earn Swagbucks. The Money Saving Mom did a good series about them here. One other way you can earn Swagbucks is by referring others, you can earn matching Swagbucks for all of their search and wins up to 1000 Swagbucks.

        They recently have just started allowing more than one account per household also, so even more people can earn Swagbucks. And if you are not already a member in addition to the normal 30 Swagbuck sign up bonus you can earn a 50 Swagbuck bonus if you sign up and use the code AUGUSTBONUS through Friday, August 12.

        (Note: Links in this post are affiliate links. Read my disclosure policy here.)

        Disclosure and Privacy Policy

        Disclosure Policy

        The main purpose of this blog is to help others by sharing what I have learned to make myself and keep others up to date about what our family is up to. I am really enjoying this process, and it is helping with my own organization as well.

        However, I am also including ads and affiliate links on this blog in hopes that is may earn a little extra income for our family eventually. When you use these links, I may receive some small compensation from these companies. All views and opinions presented here are always completely my own; I simply want to live with integrity and to be up front and honest about everything on this site.

        Privacy Policy

        This blog does not share personal information with third parties nor do we store any information about your visit to this blog other than to analyze and optimize your content and reading experience through the use of cookies.

        You can turn off the use of cookies at anytime by changing your specific browser settings.

        We are not responsible for republished content from this blog on other blogs or websites without our permission.

        These policies are subject to change without notice and were last updated on January 8, 2013.

        As always feel free to contact me at anna@thedoityourselfmom.com with any questions or concerns.


        Glad that's done, now these cookies are more fun to talk about!

        DIY Corn Syrup

        I don't regularly buy corn syrup and don't really like to have it in our diets anyway. But I came across a couple of recipes for art supplies that I wanted to try now, and some special treat recipes to possibly make for the holidays that called for corn syrup. I also have no idea if I could actually buy it anywhere in Kunming. So, I learned how to make my own. I am not sure if this is much healthier than regular corn syrup (because the cream of tartar is supposed to breakdown the sugar to simple sugars that prevent crystal formation), but if you have corn allergies, can't get corn syrup, or just don't want to buy something you rarely use, this is a great alternative.

        Homemade Corn Syrup Substitute Recipe

        • 2 cups of sugar
        • 3/4 cup of water
        • 1/2 tsp cream of tartar
        • 1/4 tsp salt
        1. Mix all ingredients in at least a 2 or 3 quart (or liter) saucepan. The syrup really bubbles up at first and you don't want burning hot syrup bubbling up onto you or your counter.
        2. Slowly bring to a rolling boil, while stirring constantly.
        3. Reduce heat and simmer until thickened to soft ball stage. To determine soft ball stage use a candy thermometer (soft ball stage is is 235-240 F at sea level*). At soft ball stage, the syrup will form a soft ball when a drop is dripped into cold water. This ball will flatten when taken out of the water.

        *If you forget that you are cooking at a high altitude, and that this effects not only baking but boiling temperature, like I did, and you keep trying to cook the syrup to this temperature, the syrup will definitely smoke and burn. At that point you will need to throw that batch out, carefully because it is amazingly hot. then you will need to start over. And if you are running low on sugar you may decide to reduce all amounts and make a tiny test batch, which is why my jar of syrup is so small. I then made sure to test the stage of the sugar syrup by dripping a small amount in cold water. This worked much better. My small test batch turned out amazingly well though, thick and really sweet like regular corn syrup, so it was a resounding success. And the tiny batch made enough for the watercolors and glue that I wanted to make now anyway, and they turned out great. I'll just have to make more syrup when I need it next. At least now I know how to do so without smoking up the kitchen.

        This regular recipe makes about 2 cups of syrup and is supposed to keep well for up to two months.

          DIY Ice Cream Cones: Making Ice Cream Cones Without a Cone Stand

          Want a cone to put your homemade ice cream or frozen yogurt in but don't have any on hand? Looking for a fun summertime activity? Or just want to make the whole dessert from scratch? Try your hand at making your own ice cream cones from this recipe adjusted slightly from Joy of Baking. They taste really good and are like a cross between a crepe and a sugar cone. It is a little tricky to get the hang of cooking the batter and rolling the cones. But if all else fails, line a bowl with them and call it a waffle crepe bowl. Bowl shaped cones are also less messy for little kids. The taste of these cones is so good that it makes up for any imperfections in presentation and makes it hard to go back to store bought cones.

          Ice Cream Cone Recipe 

          • 2 large eggs
          • ½ cup sugar
          • ⅓ cup flour
          • ¼ cup oil
          • ¼ cup milk
          • 1 tsp vanilla or other extract (almond is excellent)
          1. Whisk together eggs and sugar.
          2. Add the rest of the ingredients, and whisk until smooth.
          3. At this point, the batter should be quite thin but not a runny mess. It should be the same consistency as crepe batter. If the batter is too thick add more milk by the tablespoon. If the batter is too thin, add flour by the tablespoon.
          4. Once the batter is whisked smooth and the proper consistency, spay a small frying pan with nonstick spray or brush with oil, and heat pan over medium low heat.
          5. Scoop ¼ cup (or a little less) batter into the warm pan and tilt until a roughly 6 inch circle forms.
          6. Cook until golden brown on one the bottom.
          7. Flip, and cook the other side until golden brown.
          8. Remove from heat, and place it on a plate to cool slightly so that you don't burn your fingers. Then, while still quite warm, roll into cone shape and pinch the bottom so that the cone won't drip.
          9. Place on a wire cone rack, or if you don't have a cone rack, do as I did and twist a clean twist tie around the bottom and place them in a small jar or cup.
          10. Cool completely, and then enjoy with your favorite ice cream or favorite  frozen yogurt.

          (makes 6–8 cones)


          These cones are best eaten immediately but can be stored in an airtight container and then be reheated the next day in an oven (350–400 F for 3–5 minutes) to crisp them up. Then you may need to roll them again. However, I really doubt you'll have any extra. And if you do, you can also just eat them by themselves like cookies.

            Tuesday, August 9, 2011

            DIY Milk Chocolate Frozen Yogurt

            While this chocolate frozen yogurt isn't quite as good as real dark chocolate ice cream, it is still really good. It is easier, cheaper, and healthier too. A great any day dessert.

            Milk Chocolate Frozen Yogurt Recipe

            • ¼ cup cocoa powder
            • ¾ cup sugar
            • 3 cups yogurt (homemade yogurt works great)
            1. Stir all ingredients together until thoroughly combined.
            2. Freeze in an ice cream freezer, or follow these directions to freeze in your regular freezer.
            This recipe makes about 1 quart or liter of frozen yogurt.

              DIY Berry Frozen Yogurt

              This berry frozen yogurt tastes so awesome that it rivals real ice cream in our house. This recipe is even more amazing with homemade almond flavored ice cream cones.

              Berry Frozen Yogurt Recipe

              • 1 cup berries (fresh or frozen)
              • ½ cup sugar (more if your berries are really tart)
              • 3 cups yogurt (homemade works great)
              1. Choose your berries (blueberries, raspberries, strawberries, etc.), and wash them if they are fresh. For this batch, I used a combination of mulberries and Chinese waxberries (yǎ měi,  雅美). Yǎ měi taste like a combination of cranberries and raspberries. This was a really good combination. I think blueberries and raspberries together would produce similar results, but any kind of berry should be good.
              2. Mix berries, sugar, and one cup yogurt in a blender until smooth.
              3. Stir in the rest of the yogurt. This keeps the mixture from getting to thin.
              4. Freeze in an ice cream freezer, or follow these directions to freeze in your regular freezer.
              This recipe makes about 1 quart or liter of frozen yogurt.

              DIY Peach Frozen Yogurt

              White peach frozen yogurt
              (you can see the small pink flecks of skin)
              Light and refreshing, this fruity frozen yogurt is a real winner around here. Aaron even choose it over chocolate one night.

              Peach Frozen Yogurt Recipe

              • 1 cup peaches
              • ½ cup sugar
              • 3 cups plain yogurt (homemade works great)
              1. I used fresh peaches, so first I removed the pit and sliced them. I didn't bother to peel them, because I am lazy and don't like to peel fruit when it isn't necessary. You can also use canned or frozen peaches if you don't have fresh.
              2. Put peaches, sugar, and 1 cup yogurt in the blender, and blend until smooth. This gets all ingredients super-smooth really fast. You can't even taste the peel. You can only see small specks in the yogurt.
              3. Stir in remaining yogurt to prevent thinning the mixture to much.
              4. Freeze in an ice cream freezer or follow these directions to freeze in your regular freezer.
              Recipe makes about 1 quart or liter of frozen yogurt.

              LinkWithin

              Related Posts Plugin for WordPress, Blogger...